If the setup connector is plugged in to the controller, the relay module will not be controlled by the interface, and the relay contacts will remain in the quiescent position.
A subsequent release of the maths- and logic option can be realized via setup program to the Dicon 40x/50x and interface connection to the controller.
For release of this option it is not essential that the controller is fully wired; only the voltage supply of the controller must be connected.
The interface connection can be easily realized with a JUMO USB-TTL-Interface or with a JUMO RS232-TTL-Interface via the standard programming interface of the controller.
Alternatively to the JUMO interface connection an optional interface RS485/RS422 can be used for connection establishment.
Access to the menu for the release of maths- and logic option via menu “Extras” - “Release of additional codes” . Before acccess to this menu, please open a setup file (e.g. via menu “File” – “New”.
With “read-out code number” the code number is displayed – for a release of the above mentioned options JUMO must be provided with this code number.

Dicon 40x/50x -Setup
The generated code number incl. possible sign, can be provided by E-mail, fax or phone. Upon receipt of this number, JUMO generates the release code and informs you accordingly.
Please put in this release number you get from JUMO as follows:

The release of maths-/ logic option is completed upon input and confirmation of the release code.
In order to edit the corresponding maths- or logic formula in the setup program, you either need to re-start the automatical identification or to adjust the released option manually under “Hardware”.
The available options for the measurement range depend on the hardware configuration.
This can be changed by altering the positions of two jumpers.
For the ranges -10 / 0 / 2 - 10 V, the jumpers on the CPU board (inputs 1 and 2) or the input board (inputs 3 and 4) must be set as follows:

CPU board

Input card:
Note:
Making settings through the setup program will only be possible if the jumpers have been set accordingly.
The acceptance of the address only takes effect when the supply is switched off and on again (DICON).
The JUMO DICON 400/500 or 401/501 provides the option of programming up to 8 such limit comparators.
In order to make the best use of a limit comparator, it must be programmed for the required switching response.
The switching response is defined by the limit comparator functions (lk 1 - lk 8).
lk 1 - lk 6 are functions based on the setpoint, and lk 7 - lk 8 are based on fixed limits.
For lk 1 - lk 6, the AL (alarm level) is the difference between the setpoint W1 and the switch-on or switch-off point.
For lk 7 - lk 8 the AL is an absolute limit value at which the contact will switch on or off.
Example:
Function lk 8 > limit value 70 °C, the assigned output remains switched on unless the process value rises above 70 °C, whereupon it is switched off.
If the process value falls below 70 °C, the output is switched on again.
The return switch-on point can also be controlled by a switching differential.

lk1

lk2

lk3

lk4

lk5

lk6

lk7

lk8
In this level you can test the display, keys, switching outputs, and so on.
SERVICE
The matrix display shows alternately "Code-NR." and "0000". Use the <Enter> key to move one digit to the left, use the arrow keys to set "7", and press the <Enter> key 3 times.
ANZEIGE
All the displays will be lit up.
KEYS
The keys that are pressed will be indicated in plain text in the matrix display (display 3).
LOGIC IN
The matrix display indicates "00000000". Setting the logic inputs to "0" (e.g. by closing a contact) changes each one of the zeroes to a "1", e.g. "11111111" (depending on the version fitted).
RELAYS
Outputs 1 - 6 <Enter> à For switching outputs (relays, solid-state relays, logic): the outputs can be switched by using the arrow keys. When the keys are released, the relays drop out again.
This test function has no effect for analog outputs or logic inputs.
INTPT100
The matrix display shows alternately "Temp" and the cold-junction temperature measured at the moment (for thermocouples, in the back panel).
SCHNITTS (interface)
The device shows the count of the number of commands received in the upper display (display 1).
In the middle display (display 2), the device shows the count of the number of commands sent.
Note:
On devices that only communicate via the setup program, both counts must be identical. The <Enter> key can be used to reset the count to "0".
The corresponding output must be configured as "2 REGAUS" or "Controller output 2".
It is also necessary to check that the controller parameter Y2 is set to -100.

DICON 40x/50x Setup

The individual registers offer various test options for outputs, keys etc.
Important:
You must not alter any values in the register card Calibration constants.
If you do this nevertheless, the calibration data will be partially or completely lost, and the controller will have to be returned to the main factory for recalibration.
The controller output types must be defined before self-optimization can be started.
When the device is used as a program controller, the <Exit/manual> key must be set to manual mode. Then use the arrow keys to set a setpoint that is close to reality for the process, and confirm with the <Enter> key.
Now press the following keys simultaneously: <PGM> + <Automatic>.
The self-optimization will stop by itself.
It can also be canceled by using the key combination <PGM> + <Automatic>.
For the value entry, a whole number is entered first.
If a decimal point position is necessary, this can be moved up or down (i.e. to left or right) by using <ENTER+UP> or <ENTER+DOWN>. In this case, the last decimal place must be a zero.
Note:
The decimal point is only present if the decimal place has been programmed for the display configuration. If this is not done, then the controller will round the entry up or down.
So there is a distinction made between the display and the value entry.
If, for instance, the setpoint is configured for the display with just a single decimal place, then a value that is entered with two decimal places will be rounded up or down to give only one decimal place.
You can only use the external relay module in conjunction with the setup program. The control function for the relay modules is activated by placing a tick mark for "Activate relay module" in the extended configuration.

Extended configuration
Only when this has been done will the setup program provide the option of assigning functions to the ER8 external relay module,
for example: Relay function 1 : Controller output 1/ Relay function 2 : Limit comparator 1

Relay module
PT100, 3-wire
For testing, link terminals 10 and 11 of input 1, and connect a fixed resistor or resistance decade between 9 and 10.
| Value of resistor / resistance decade setting |
Display value |
| 18.52 ohms | -200 °C |
| 100 ohms | 0 °C |
| 109.73 ohms | 25 °C |
| 390.481 ohms | 850 °C |
Thermocouple
For testing, link terminals 10 and 11 of input 1.
If the input is working correctly, the controller will indicate the ambient temperature.
Current/voltage input
For testing, configure input 1 to 0-20mA or 0-10V.
If the input is open-circuit, the display will indicate the lower scaling value (start of display range).
If a 20 mA or 10 V source is connected, then the upper scaling value (end of display range) will be indicated. As standard, this corresponds to 0-100 %.
Use Service mode on the device, or the Calibrate and Test function in the setup program.
In general, only the 500/501 provides the option of retrofitting up to 2 inputs.
These can only be inserted in the slots A and B, which are reserved for this purpose.
If a retrofitted input operates with the signal range -10/0/2-10 V, then the hardware configuration must be checked.

You will need a converter from RS232 to Profibus DP
Start the JUMO GSD generator…

JUMO GSD Generator
Move the measurement values for analog inputs 1+2 into the "PLC input" field.
"File" à "Diagnosis" à "Settings"
Set the slave address and the COM port à "OK"
"Online"
The values will now be shown in the value field:

value field
Math and logic formulae are entered via the setup program on the PC.
Formulae cannot be edited through the keys on the device.
The following passwords are factory-defined:
| Parameter level | 0001 |
| Configuration level | 0002 |
| Recalibration | 0004 |
| Program editor | 1000 |
| Delete programs | 1001 |
| Service mode | 0070 |
Note:
These passwords can be altered in the setup program, under "Code numbers".
If the device is used as a process / fixed setpoint controller, the controller output level is preset when manual mode is used.
If the device is used as a program controller, a fixed setpoint is given when using manual mode, and the controller regulates to this setpoint.
If the <Exit/Hand> key is pressed while the program is running, a temporary setpoint change can be programmed. This will only be effective for the program run taking place at the moment. After a new program start, the values that are defined in the program editor will apply.
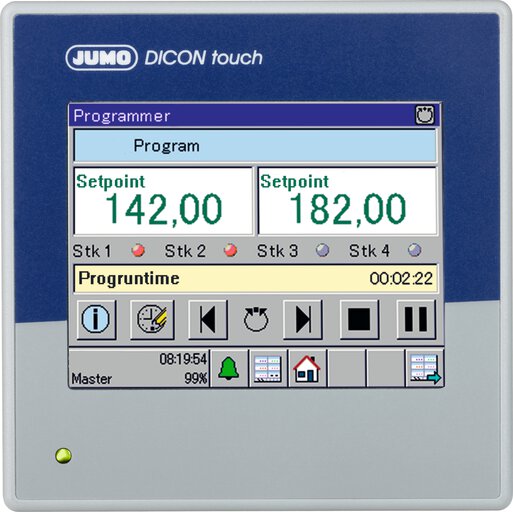
You can either enter the setpoints and times directly on the device, or use the PC program to write a program file that is transferred to the device.
This is a programming example for the following program profile:

program profile
Writing (i.e. entering) the profile on the device (example)
| Segment number | Setpoint | Segment time |
| 01 | 0 | 00:10:00 |
| 02 | 100 | 00:10:00 |
| 03 | 100 | 00:10:00 |
| 04 | 0 | 00:00:01 |
")
Writing the profile as a program file, on the PC (example)